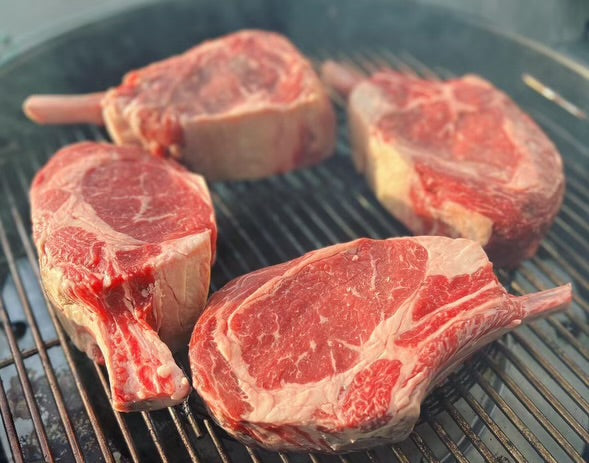
When it comes to perfecting the art of BBQ, the reverse sear method has gained popularity for good reason. Whether you’re cooking a juicy steak, a thick cut of pork, or even a tender lamb chop, reverse searing allows you to achieve a perfectly cooked piece of meat with a rich, crispy crust and a tender, juicy interior.
So, what exactly is reverse searing, and why is it a game-changer for your BBQ? Let’s dive into the details.
What is Reverse Searing?
The reverse sear method flips the traditional cooking technique on its head. Instead of searing the meat first and then finishing it at a lower temperature, you start by slow-cooking your meat and then finish with a high-heat sear. This technique ensures a more even cook throughout the meat, resulting in consistent doneness and incredible flavour.
Step-by-Step Guide to Reverse Searing
-
Slow and Steady
Start by cooking your meat at a low temperature, either in your oven or BBQ. The goal here is to gently bring the internal temperature of the meat up without overcooking the outer layers. For BBQ enthusiasts, this is the perfect opportunity to use indirect heat. Cook your meat at around 100-120°C (210-250°F). -
Monitor Temperature
Use a meat thermometer to keep track of your meat’s internal temperature. For steaks, you’ll want to cook it to about 10-15°C (18-27°F) below your desired doneness. For example, if you like your steak medium-rare, aim for an internal temperature of 50-52°C (122-125°F) before searing. -
Rest Before Searing
Once your meat reaches the desired temperature, take it off the heat and let it rest for a few minutes. This resting period ensures that juices are evenly distributed and reduces the risk of overcooking during the final sear. -
Sear at High Heat
Crank up your BBQ or heat a cast-iron skillet over high heat. Sear your meat for about 1-2 minutes per side, or until you achieve a rich, golden-brown crust. This final step locks in the flavour and creates that irresistible texture we all crave. -
Serve and Enjoy
After searing, let your meat rest briefly before slicing and serving. The result? A perfectly cooked piece of meat that’s juicy, tender, and full of flavour.
Why Reverse Searing Works So Well
- Even Cooking: The reverse sear method allows the meat to cook evenly from edge to center, reducing the risk of overcooking the outside while the inside remains underdone.
- Perfect Crust: Searing at the end ensures you get that beautiful, caramelized crust without sacrificing tenderness.
- Enhanced Flavour: Slow-cooking the meat first gives it more time to absorb the flavours from any rubs or marinades, resulting in a more robust taste.
- Versatility: This method works not only for steaks but also for larger cuts of meat like roasts, chops, and even poultry.
Pro Tips for Reverse Searing Success
- Use a Meat Thermometer: This is essential for getting the perfect doneness. Reverse searing is all about precision, and a thermometer will ensure you hit your target temperature.
- Choose the Right Cut: Reverse searing works best with thicker cuts of meat, ideally at least 1 inch thick. Ribeye, sirloin, and porterhouse steaks are excellent choices.
- Rest Between Stages: Letting your meat rest both after the slow cook and after the sear helps to retain moisture and enhances flavour.
- Experiment with Flavours: Add a rub like Feedlot BBQ’s Cattle Call Rub before slow cooking to infuse the meat with extra layers of flavour.
Try Reverse Searing at Your Next BBQ
Next time you fire up the BBQ, give the reverse sear method a try. Whether you're cooking for family, friends, or just perfecting your BBQ skills, this technique is sure to impress and elevate your grilling game. Remember, BBQ is an art, and reverse searing is one of the finest techniques for achieving meat perfection.


